background

Wednesday, May 23, 2012

Quilts For Kids & Con-Kerr Cancer

A few days ago I found out about this program called "Quilts For Kids" and I cannot wait to be involved! I received confirmation today that my quilt kit is on its way! Here is the website so you can read all the details. If you can help in ANY way, please do!


This is similar to a program I have been involved with for about a year now called Con-Kerr Cancer. If you are looking for a smaller project to help, check out this program that makes pillowcases for children! The last batch I did I used some fabric that had been given to me and some Hannah Montana fabric I found on clearance at Hancock Fabrics. All it cost me under $10 but knowing that a child is snuggled up with a snuggled up with a fun pillow and a smile is priceless :)


Crayon Monogram & Tutorial

Earlier this week I started searching for gift ideas for my daughter's teachers. I wanted something handmade and fairly easy. I found this idea online and instantly knew I had to try it! Here's my version and how I did it.

Not only is it adorable, but it's CRAYOLA CRAYONS! There is just something about a brand new crayola crayon that sparks creativity in me! Ohh... that gives me a fabulous decorating idea - we'll revisit that idea later :-)

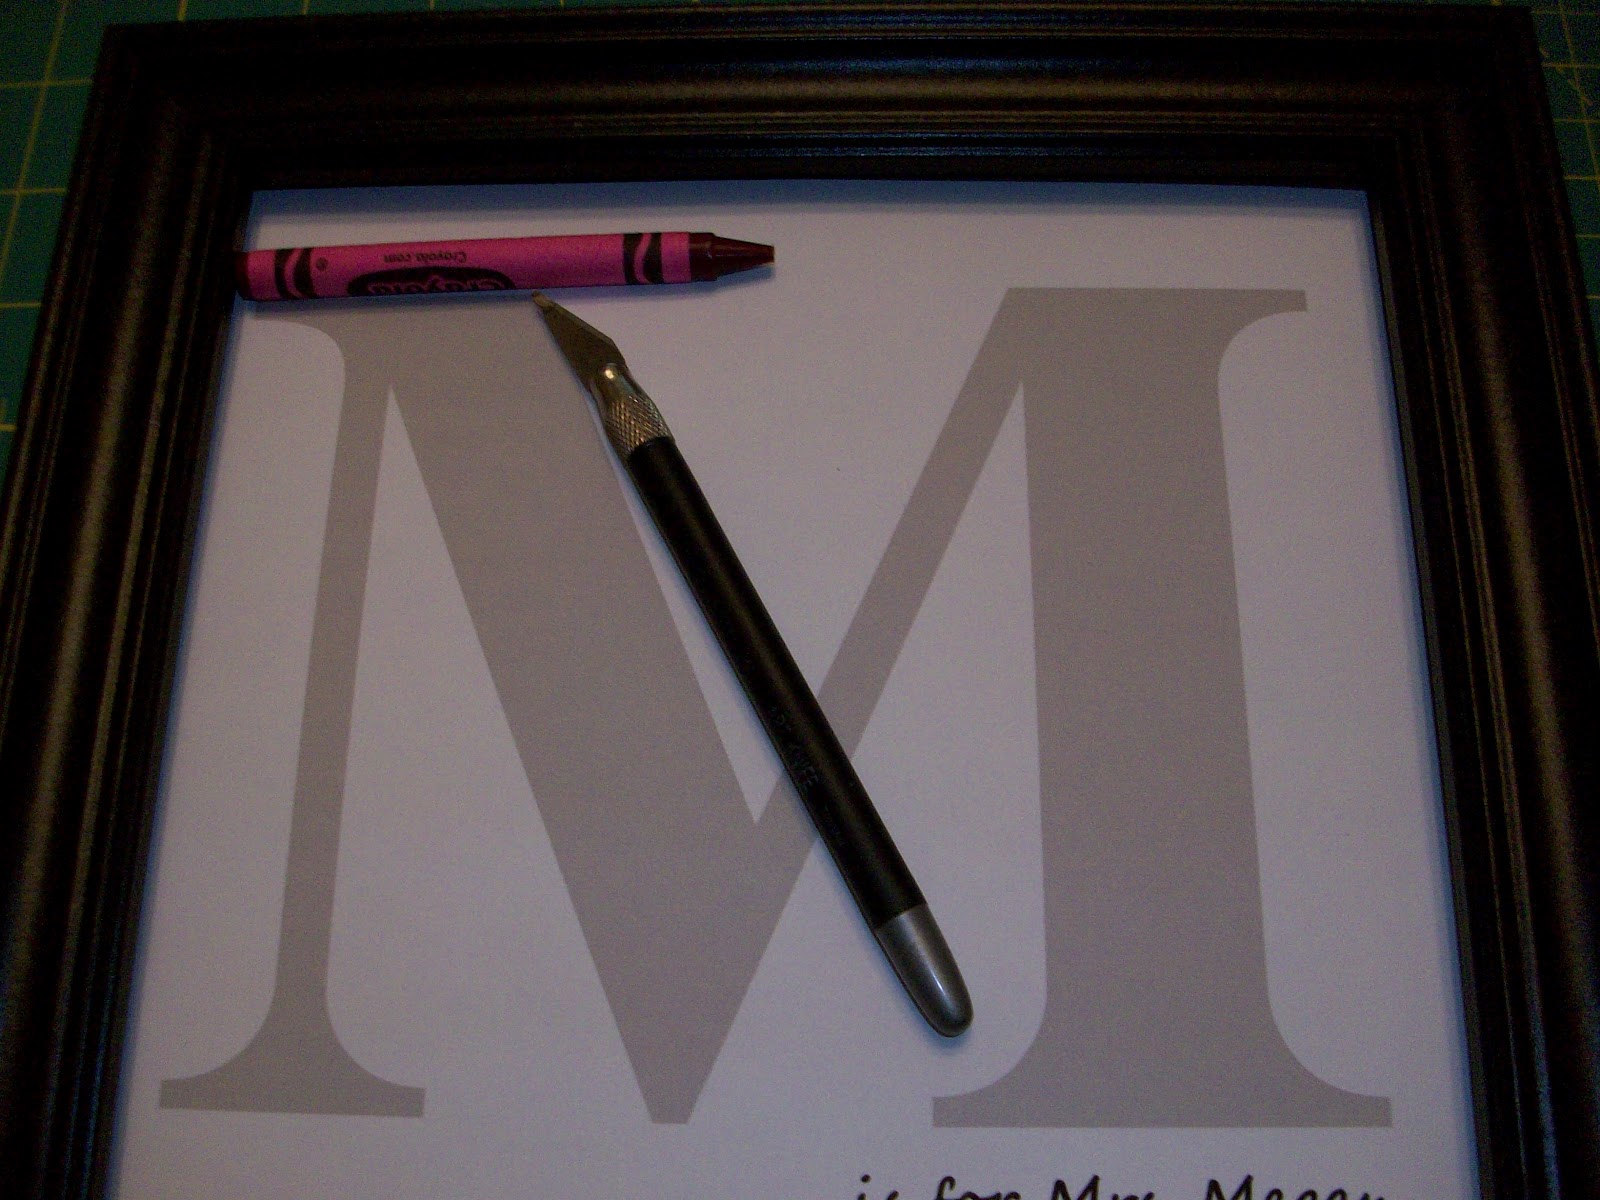
After a little trial and error - this project works best with letters that have STRAIGHT edges. Letters like C, O, and Q are slightly more difficult, but I am working on some ideas to make those look better.

 
MATERIAL COST: under $6
I ran to Wal-mart and picked up a 8x10 black frame for $3 and 2 packs of crayons for $1.17. I actually already have boxes of crayons since I stock up at the beginning on the school year when they are on sale for 25 cents. However, this way I know an estimate cost if I don't have a small crayola factory in my house.

Materials:
2 boxes of 24 count CRAYOLA crayons per letter
1 frame (I used 8x10)
hot glue gun and hot glue sticks
exacto knife (if you don't have one, just use a sharp kitchen knife)
computer/printer/software - if you choose to create the design on the computer and print it like I did. You can always just draw your letter how you want on paper instead of printing.

Instructions:

1. Design your letter and any words you want to include.
2. Print (if using a computer) onto paper. I used white CARDSTOCK instead of plain paper. The paper is a little thicker and sturdier than regular paper. If you don't have cardstock, regular paper will be just fine.

3. Open the frame and remove the glass and any matting that may be included. You only need the frame and the back.

4. Insert YOUR letter and close the frame up. It's best to go ahead and put your LETTER in the frame before starting, this way you know exactly how it's going to look and you can line everything up how you want to. You might have to trim the edgesto make it fit. Since I printed on 8.5 x 11 paper, I had to trim a bit.

5. Lay out the crayons in the order you want them to be on the picture. Remember BOYGBIV? (red, orange, yellow, green, blue, indigo, violet)


6. Start at the TOP!! Lay out the first crayon you want to use and score it (or mark it gently) where you want to cut. Then take the crayon onto your cutting mat and cut it.


I found a tip online that said if you are cutting a straight line, just score it and the crayon breaks easily. This was very helpful!


When you cut at an ANGLE, do so slowly and don't stress over the small bits and pieces that are going to break off every now and then. If the wrapper comes off the crayon, just dab a little glue stick it back on.

Tip: Keep in mind the crayon wrapper is also a design element and use it to your advantage!


7. Continue adding crayons in the order they are layed out in. This is why it was helpful to lay out both boxes from the start, it's easy to get all those left over bits and pieces mixed up.

8. Viola! You're all done! Super CUTE and personalized! If you would like your little one to help, you can probably do this project with Elmer's Glue, it would just take longer to dry.


Credits: I found this project on several sites, including here and here as well as on Pinterest. In no way do I mean to step on anyone's toes here. The only credit I claim is the fun I had making this :)

Monday, January 17, 2011

Sewing Room

What is suppose to be my sewing room continues to be everything else BUT a sewing room. The sad fact is that sometimes my sewing machine doesn't even get turned on for weeks at a time :-(
Well. it's time to fix that.
The problem? EVERYTHING happens in my sewing room - computer, bills, phone calls, toys, coupons, .... the list goes on and on! So, it's time to limit what goes in the sewing room!
First step, organization and a big box to goodwill :-)
I will soon have a large cubby-style bookshelf to organize fabric and sewing books on which should help a lot! I already have a large walk in closet with shelves but it seems to be a catch-all for anything I don't want my 1 year old and 3 year old to play with, so it's not very useful currently.
In addition, I recently moved my hubby's computer into my sewing room so we'd be able to spend more time together, but with it came a load of other things that were not in the original plan.
So, time for those items to find a new home in the newly renovated basement (btw, that's another huge project in the works right now!)
Now, I just need to find some extra time to get all the projects done! Like now :-)

Sunday, January 31, 2010

Cheapest diapers EVER ... literally :-)

Ok, this was a once in a lifetime coupon deal that I am so excited about, I had to blog about it :-)

Target had Huggies on sales for 8.99 for a jumbo pack and if you buy 3 you get a $5 Target gift card. So, I bought 3 packs $8.99 x 3 = $26.97 Then subtract my gift card since I plan to use it to buy something I would have normally bought anyways $26.97-$5 = $21.97. Then Target allows one Target coupon and one manufacture coupon per item. So, I had 2 manufact. coupons for Huggies $3 off $21.97 -$6 (2x$3) = $15.97. Then I had 3 Target coupons for $1 off huggies $15.97 -$3 (3x$1) = $12.97. Then, I had a coupon for "buy one pack of huggies, get one free" and it was a manufacture coupon, and since I had only used 2 so far, I could use this one on the third pack. So, $12.97 - $8.99 (price of one pack) = $3.98. Then I factor in the rebate for sending in the upc and reciept to caregivers marketplace which is 75 cents per pack. $3.98 - $2.25 ($.75 x3) = $1.73 divided by three packs of diapers = FIFTY EIGHT CENTS PER PACK for HUGGIES DIAPERS!!!!!!!!!!!!!!!!!!!

Wednesday, September 30, 2009

Sewing Machine Shopping

I am very excited to say that I am SEWING MACHINE SHOPPING!! Woo Hoo!

I have spent a lot of time and research looking into starting my own home-based sewing and monogram business and now it's time to get the equipment :-)

I am not getting rid of my current sewing machine, I love it and I will still use it all the time, but it's time for some embroidery and monogram functions. Also, all those little "bells and whistles" sure sound good. I am drooling just talking about it!

I have my new machine all picked out, now I am just waiting and looking around for the best deals, warranty, classes offered, etc. Believe it or not, I am most likely going to buy from Joann. They offer free classes if you purchase from them and since I have never owned an embroidery machine before, a few classes would be very helpful. They also have about the same prices as Ebay and other competitors, so it's a good bet.

And yes, this adventure is supported by hubby :-) He just finished my new sewing tables, so I have an 8 foot table and an extra wide 4 foot table for laying out fabric. I actually have a sewing ROOM now!

Guess what family and friends are getting for Christmas? :-)

Friday, September 4, 2009

Quilting Class and Car Seat Update

I am very excited that I am going to take a machine quilting class!! Woo hoo! All of my quilting is straight lines and I am just drooling to make some swirlies :-)

Also, very excited (again) to say that the baby's carseat cover is almost done! A quilted car seat cover, only I would be that crazy to try something so ridiculous, but I LOVE it! I don't have any pictures yet, but believe me, when it's done, they will be everywhere, hehe!

Thursday, August 20, 2009

My Sewing Machine

Well, I have to admit that I LOVE my sewing machine! I SOOOOOO wish (insert hint here for hubby!!) I had another machine that had the "bells and whistles" and maybe more than 15 stitches too, but I can't complain about the machine I have. It is always working (knock on wood)and so far I have not had any problems at all. It has been a trooper letting me learn the basics over the past year and a half. Now that I am learning to quilt, I would love some nicer stitches, a larger sewing surface, and some embroidery functions! Every machine I find that has everything I want starts at around $300, which means I will be waiting for a while :-) But as I have learned just from this machine, hold out for the good stuff. I had a Brother (plastic machine) and it was miserable. I thought sewing was the hardest thing in the world because the machine sucked! Then my grandmother gave me her second machine, a Singer, and it's awesome. My Singer has even let me learn to machine quilt a little and hasn't put up too much of a fight :-)